Are you ready to start accepting payments on your Indian WooCommerce store but feel overwhelmed by payment gateways? You want to offer popular options like UPI, credit/debit cards, and net banking, but the technical setup seems confusing. You’re not alone. Many store owners hesitate at this crucial step, worried about breaking their site or not configuring things correctly.
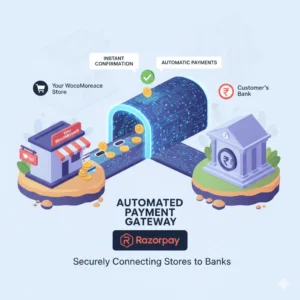
The good news is, it’s much simpler than you think. In this guide, we will walk you through the entire process of integrating Razorpay, one of India’s most popular payment gateways, with your WooCommerce store. By the end of this post, you’ll have the confidence and the knowledge to securely accept payments from your customers.
What You’ll Need Before You Start
Before we dive into the steps, let’s ensure you have everything you need.
- A WooCommerce Store: Your store should be up and running with products.
- A Razorpay Account: You’ll need to sign up for a merchant account at Razorpay. The video mentions that completing your KYC (Know Your Customer) is essential for Razorpay to transfer funds to your bank account.
- Admin Access: You must be able to install plugins and modify settings on your WordPress site.
Understanding Razorpay’s Two Modes: Test vs. Live
One of the most important concepts when setting up any payment gateway is the difference between Test Mode and Live Mode.
- Test Mode: This is a safe sandbox environment. You can run test transactions without using real money. This is crucial for ensuring your payment process works perfectly before going live with real customers.
- Live Mode: This is the real deal. All transactions in this mode involve actual money.
Always do your setup and initial testing in Test Mode. Once your Razorpay account is fully approved and you’re ready to go live, you can switch to Live Mode using the same process but with your live API keys.
Step-by-Step Guide: Connecting Razorpay to WooCommerce
Follow these steps carefully to integrate Razorpay seamlessly with your store.
Step 1: Install the Official Razorpay WooCommerce Plugin
The first step is to get the right tool for the job. WooCommerce makes this easy.
- From your WordPress dashboard, go to Plugins > Add New.
- In the search bar, type “Razorpay for WooCommerce“.
- Look for the official plugin developed by “Team Razorpay” and click Install Now, then Activate.
[Screenshot of the WordPress plugin search results page showing the "Razorpay for WooCommerce" plugin]
Step 2: Find Your Razorpay API Keys
API Keys are like a secure handshake between your WooCommerce store and Razorpay. They allow the two systems to communicate.
- Log in to your Razorpay Dashboard.
- Ensure you are in Test Mode (you’ll see this in the top corner).
- Go to Settings > API Keys from the left-hand menu.
- Here, you will find your Key ID and you can generate a Key Secret.
- Crucial Tip: Your Key Secret is only shown once. Make sure to copy it immediately and save it somewhere secure. You can also download it.
[Screenshot of the Razorpay Dashboard highlighting the API Keys section, Key ID, and the "Generate Key Secret" button]
Step 3: Configure Razorpay in Your WooCommerce Settings
Now, let’s connect the two platforms using the keys you just copied.
- In your WordPress dashboard, go to WooCommerce > Settings > Payments.
- You should see “Razorpay” listed as a payment method. Click Manage.
- Enable the gateway by checking the box.
- Enter a Title (e.g., “Pay by UPI, Card, Net Banking”) and a Description.
- Paste the Key ID and Key Secret you copied from your Razorpay dashboard into the respective fields. Be careful not to add any extra spaces.
- For Payment Action, selecting “Authorize and Capture” is recommended for most stores, as it automatically confirms the payment upon successful authorization.
- You can leave “Debug Mode” disabled and click Save changes.
[Screenshot of the WooCommerce Razorpay settings page, showing where to paste the Key ID and Key Secret]
Testing Your Razorpay Integration
Never skip this step! Testing ensures a smooth customer experience.
- Go to your live store and add a product to the cart.
- Proceed to checkout. You should now see Razorpay as a payment option.
- When you click “Place Order,” the secure Razorpay checkout window will appear.
- Razorpay provides test credentials. For example, to test a successful UPI payment, use the UPI ID:
success@razorpay. - You can also test card payments using the test card numbers provided in your Razorpay dashboard under Test Card Details.
After a successful test payment, check your WooCommerce Orders section. The order status should automatically update to “Processing,” and you should see the Razorpay transaction ID. You can also verify the test transaction in your Razorpay dashboard.
Want to Put This Lesson into Practice?
Reading about a setting is one thing, but the best way to learn WooCommerce is by doing. If you’re nervous about breaking your live store, or don’t have a safe place to experiment, a ‘sandbox’ is the perfect solution.
We offer a WooScribe Practice Account that gives you a pre-built WooCommerce store to test, tweak, and practice on, completely risk-free.
[Sign Up for Your Risk-Free Practice Account Here]
Common Questions About Razorpay WooCommerce Integration
What is the difference between Key ID and Key Secret?
Your Key ID is a public identifier for your Razorpay account. Your Key Secret is a private key that authenticates requests. Think of it like a username (Key ID) and an extremely sensitive password (Key Secret). You must keep your Key Secret secure and never share it.
Do I need to complete KYC to use Razorpay?
Yes. As mentioned in the video, you can integrate and test Razorpay without a completed KYC. However, Razorpay will only transfer the funds to your bank account once your merchant KYC is successfully completed and verified.
Can I use other payment gateways like Stripe or PayPal with the same method?
Absolutely! The process is very similar for most modern payment gateways. They will also provide you with a set of API keys (like a Key ID and Secret) that you plug into their respective WooCommerce plugin settings. The core concept of using Test Mode and API keys remains the same.
Ready to Go from Practice to Pro?
Once you’re comfortable with the basics, you might wonder, “What’s next?” A practice account is great for testing, but a structured course gives you the complete roadmap from beginner to confident store owner.
Our comprehensive course guides you through every aspect of WooCommerce, from setup and product creation to advanced shipping, payments, and marketing, all with expert guidance.
If you’re serious about mastering WooCommerce, check out our WooCommerce 101 – Recorded Video Course.
Conclusion
Integrating Razorpay with WooCommerce is a straightforward process that unlocks a world of payment options for your Indian customers. By following the steps outlined—installing the official plugin, retrieving your API keys from the Razorpay dashboard, and configuring the settings in WooCommerce—you can have a professional, secure payment system up and running in no time. Remember to always test thoroughly in Test Mode before going live. Now, go ahead and empower your store to start accepting payments!