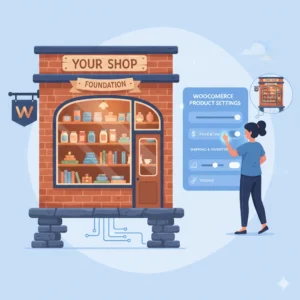
Your WooCommerce store looks fantastic. You have products, variations, and images that change dynamically. Customers can add items to their cart, but something crucial is missing. Are you displaying prices correctly, inclusive or exclusive of tax? Is GST being calculated automatically at checkout? If not, you’re leaving your customers confused and potentially facing compliance issues.
Setting up taxes might seem daunting, but it’s a fundamental part of running a professional online store. In this guide, we’ll walk you through the entire process of configuring taxes in WooCommerce, step-by-step. By the end, you’ll know exactly how to enable tax calculations, set up standard GST rates, and control how prices are displayed to your customers, ensuring a transparent and trustworthy shopping experience.
Why Proper Tax Configuration is Essential
Before we dive into the settings, let’s understand why this is so important. Configuring taxes correctly does two key things:
- Builds Customer Trust: When customers see the final price (including all taxes) before they reach the checkout, they are less likely to abandon their cart. Surprise costs are a major reason for cart abandonment.
- Ensures Legal Compliance: Collecting and remitting the correct taxes (like GST in India) is a legal requirement for most businesses. WooCommerce automates these calculations, making compliance much simpler.
Step 1: Enabling Taxes in WooCommerce
By default, the tax settings in WooCommerce are often hidden. Here’s how to enable them.
- From your WordPress dashboard, go to WooCommerce > Settings.
- Click on the General tab.
- Scroll down to the bottom of the page, and you will find an option that says “Enable taxes and tax calculations.”
- Check this box.
- Click Save Changes.
[Screenshot: The WooCommerce General Settings page, with an arrow pointing to the "Enable taxes and tax calculations" checkbox.]
Once you save the changes, you’ll notice a new Tax tab appear in the settings menu. This is where all the magic happens!
Step 2: Configuring Your General Tax Options
Click on the new Tax tab. You’ll see several options. Let’s break them down in simple terms.
Price Entry and Calculation Settings
- Prices entered with tax: This is a critical choice. You must decide if the product prices you enter already include tax or not.
- Yes, I will enter prices inclusive of tax: This means when you set a product price to ₹649, that is the final amount the customer pays, and the tax is included within it. WooCommerce will calculate how much of that ₹649 is the product cost and how much is tax.
- No, I will enter prices exclusive of tax: This means when you set a price to ₹649, this is the product cost before tax. WooCommerce will then add the tax on top during checkout.
- For this guide, we’ll choose “Yes, I will enter prices inclusive of tax.”
- Calculate tax based on: This determines the customer’s location used for tax calculation.
- Customer shipping address: Uses the address where the order will be shipped.
- Customer billing address: Uses the address associated with the customer’s payment method.
- Shop base address: Uses your store’s registered address.
- A common and recommended practice is to set this to “Customer billing address.”
- Shipping tax class: If you charge tax on shipping costs, you can define it here. For simplicity, we’ll leave this as the default.
[Screenshot: The main Tax settings page in WooCommerce, highlighting the "Prices entered with tax," "Calculate tax based on," and "Shipping tax class" options.]
Display Settings for Customer Clarity
This section controls how prices appear to your customers throughout your store.
- Display prices in the shop: Choose whether to show prices Including tax or Excluding tax on product pages and shop archives. For transparency, “Including tax” is best.
- Display prices during cart and checkout: Similarly, set this to “Including tax” so the customer sees the final amount they need to pay.
- Price display suffix: This is a powerful little field. You can add text like “incl. GST” or “inclusive of all taxes” to make it crystal clear.
[Screenshot: The "Display prices" section of the Tax settings, showing the dropdowns set to "Including tax" and the suffix field filled with "incl. all taxes."]
After configuring these, click Save Changes.
Step 3: Setting Up Your Tax Rates (e.g., GST)
Now, let’s tell WooCommerce what tax to charge. We’ll set up a standard 18% GST rate.
- In the Tax tab, you’ll see a section for Standard rates. Click on it.
- You’ll see a table. Click Insert row to add a new tax rate.
- Configure the row as follows:
- Country code:
*(An asterisk means “all countries.”) - State code:
*(All states.) - Postcode / ZIP:
*(All areas.) - City: Leave blank for all cities.
- Rate %:
18(This is the standard GST rate.) - Tax name:
GST(This is what the customer will see.) - Priority:
1 - Compound:
No(We are not compounding multiple taxes here.) - Shipping:
No(We are not applying tax to shipping in this example.)
- Country code:
- Click Save changes.
[Screenshot: The "Standard rates" table with a new row filled in as described above.]
Step 4: Applying Taxes to Your Products
With the global tax rate set, you need to tell your products that they are “taxable.”
- Go to Products and edit any product.
- In the Product Data meta-box, find the General tab.
- Look for the Tax status dropdown. It should be set to Taxable.
- The Tax class should be set to Standard rate.
- Update the product.
[Screenshot: The WooCommerce product edit screen, highlighting the "Tax status" and "Tax class" dropdowns set to "Taxable" and "Standard rate."]
Seeing It All in Action
Now for the moment of truth! Visit your store’s shop page. You should see your product prices displayed with the suffix you set (e.g., “₹649 incl. all taxes”).
Add the product to the cart and proceed to checkout. You will now see a beautiful breakdown: the subtotal, any shipping costs, and a line that clearly shows the total amount including the calculated GST. No more surprises for your customers!
Want to Put This Lesson into Practice?
Reading about a setting is one thing, but the best way to learn WooCommerce is by doing. If you’re nervous about breaking your live store, or don’t have a safe place to experiment, a ‘sandbox’ is the perfect solution.
We offer a WooScribe Practice Account that gives you a pre-built WooCommerce store to test, tweak, and practice on, completely risk-free.
[Link to your Practice Account Service Page]
Ready to Go from Practice to Pro?
Once you’re comfortable with the basics, you might wonder, “What’s next?” A practice account is great for testing, but a structured course gives you the complete roadmap from beginner to confident store owner.
Our comprehensive course guides you through every aspect of WooCommerce, from setup and product creation to advanced shipping, payments, and marketing, all with expert guidance.
If you’re serious about mastering WooCommerce, check out our WooCommerce 101 – Recorded Video Course.
[Link to your WooCommerce Course Here]
Conclusion
Congratulations! You’ve successfully set up taxes in your WooCommerce store. You’ve learned how to enable tax calculations, configure the general settings for clarity, set up a standard GST rate, and apply it to your products. This ensures your store is professional, transparent, and compliant. Remember, mastering WooCommerce is a journey, and you’ve just completed a crucial milestone. Keep experimenting and learning!
Common Questions About WooCommerce Tax
Q: Can I set up multiple tax rates, like CGST and SGST?
A: Absolutely! WooCommerce is powerful enough to handle complex tax scenarios. You can create multiple tax classes and rates. For example, you can set up one row for CGST at 9% and another for SGST at 9%, which together make the standard 18% GST. This is a more advanced setup covered in our full course.
Q: What’s the difference between ‘Inclusive’ and ‘Exclusive’ tax for price display?
A: Inclusive means the price shown already includes the tax (e.g., “₹649 incl. tax”). Exclusive means the price shown is the base price, and tax will be added later at checkout (e.g., “₹550 + tax”). For a better customer experience, displaying inclusive prices is highly recommended.
Q: Why aren’t taxes showing up on my cart after I set everything up?
A: Double-check two things: First, ensure the product’s Tax status is set to “Taxable.” Second, verify that you have clicked “Save Changes” on every settings page, especially the Tax Rates page.