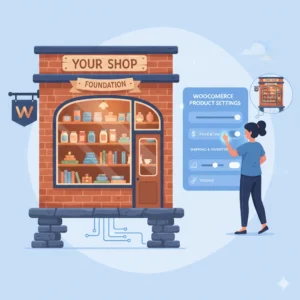
So, you’ve installed WooCommerce on your WordPress site. Congratulations! That’s the first major step. But now you’re staring at the dashboard, wondering, “What’s next?” How do you go from a basic installation to a store that’s actually ready to sell?
The answer lies in the WooCommerce General Settings. This is the control center where you tell your store who you are, where you sell, and how you operate. Getting these foundational settings right is crucial for everything that follows. In this guide, we’ll walk you through the WooCommerce General Settings tab, step-by-step, so you can configure your store with confidence.
By the end of this post, you’ll have a fully configured store ready for your first product.
Accessing the WooCommerce Settings
The journey begins in your WordPress dashboard. On the left-hand admin menu, you’ll see the WooCommerce option. Hover over it, and a sub-menu will appear. Click on Settings. This is where the magic happens.
You’ll see several tabs (General, Products, Shipping, Payments, etc.). For now, we are focusing on the General tab, which is your first and most important stop.
[Screenshot placeholder: The main WooCommerce Settings screen, highlighting the 'General' tab.]
Configuring Your Store’s Core Details
Store Address
This is the physical location of your business. It might seem simple, but this address is vital. It will be used to generate customer invoices and helps calculate things like shipping and taxes later on.
- Step 1: Enter your complete street address, city, postal code, and country.
- Pro Tip: Use your registered business address. If you’re a sole proprietor working from home, that’s perfectly fine!
[Screenshot placeholder: The 'Store Address' fields filled out with example information.]
General Options
This section defines the scope of your business.
Selling Location(s)
Here, you decide where you are willing to accept orders from.
- Sell to All Countries: Your store is open to the entire world.
- Sell to All Countries, Except For…: You sell globally but block specific countries (e.g., due to sanctions or logistical issues).
- Sell to Specific Countries: You only do business in a few selected nations. If you choose this, a new box will appear allowing you to select the specific countries.
Why does this matter? When a customer goes to checkout, they will only be able to enter a billing address from a country you’ve allowed. This prevents orders from places you can’t or don’t want to serve.
Shipping Location(s)
This is separate from your selling location. It defines where you are physically willing to ship products.
- Ship to All Countries You Sell To: The simplest option—you’ll ship to any country you accept orders from.
- Ship to All Countries: You accept orders from a limited area, but you’re willing to ship anywhere (e.g., an Indian customer buying a gift to be shipped to a friend in the USA).
- Ship to Specific Countries: You will only ship to a defined list of countries.
- Disable Shipping & Shipping Calculations: Use this if you only sell digital products (like e-books) that don’t require shipping.
Default Customer Location
This setting determines what a customer sees by default when they first arrive at your checkout page.
- Shop Base Address: Pre-fills the country with your store’s address.
- Geolocate: This clever feature uses the customer’s browser data to detect their approximate location and pre-select their country for them. This creates a smoother user experience.
- Geolocate with Page Caching Support: A more advanced version of geolocation for sites with heavy caching.
For now, “Shop Base Address” is a safe and simple choice.
Setting Up Store Currency & Formatting
This is how you get paid! Setting your currency correctly is non-negotiable.
Currency Options
- Currency: This dropdown contains every currency you can imagine. Select the one your customers primarily use (e.g., INR for Indian Rupees, USD for US Dollars, EUR for Euros).
- Currency Position: Where should the currency symbol appear? For Indian Rupees (₹), you would typically use “Left” (e.g., ₹500). For some European countries, it’s common to see it on the right (e.g., 500,00 €).
- Thousand Separator & Decimal Separator: These control how large numbers are displayed.
- Thousand Separator: In India and the US, a comma (,) is standard (e.g., 1,000).
- Decimal Separator: A period (.) is used for decimals (e.g., 19.99).
- Number of Decimals: This defines the precision of your prices. For most physical products, 2 is standard (e.g., ₹24.95). You would only change this for currencies that don’t use decimals or for specific types of products.
[Screenshot placeholder: The 'Currency options' section with INR selected and the other formatting options visible.]
A Note on Advanced Features (For Later!)
As you scroll, you’ll see options for Taxes and Coupons. It’s okay to leave these disabled for your initial setup.
- Enable Taxes: Leave this unchecked for now if you’re just practicing. You can come back and configure complex tax rules (like IGST/CGST in India) once your store is live and you understand your tax obligations.
- Enable Coupons: You can leave this enabled. It doesn’t hurt anything, and you can explore creating discount codes later.
Saving Your Settings
You’ve done the hard work! Don’t forget the most important step. Scroll to the bottom of the page and click the blue Save changes button. A success message will confirm that your store’s foundation is now solid.
Want to Put This Lesson into Practice?
Reading about a setting is one thing, but the best way to learn WooCommerce is by doing. If you’re nervous about breaking your live store, or don’t have a safe place to experiment, a ‘sandbox’ is the perfect solution.
We offer a WooCommerce Practice Account that gives you a pre-built WooCommerce store to test, tweak, and practice on, completely risk-free.
[Link to your Practice Account Service Page]
Ready to Go from Practice to Pro?
Once you’re comfortable with the basics, you might wonder, “What’s next?” A practice account is great for testing, but a structured course gives you the complete roadmap from beginner to confident store owner.
Our comprehensive course guides you through every aspect of WooCommerce, from setup and product creation to advanced shipping, payments, and marketing, all with expert guidance.
If you’re serious about mastering WooCommerce, check out our WooCommerce 101 – Recorded Video Course
Conclusion
Configuring your WooCommerce General Settings is a foundational task that sets the stage for your entire e-commerce operation. By carefully setting your store address, defining where you sell and ship, and selecting the correct currency, you build a professional and functional store from the ground up. Remember, every great online store starts with getting the basics right. Now that you’ve configured these settings, you’re ready to move on to the exciting part: adding your products!
Common Questions About WooCommerce General Settings
Can I change my store’s currency after I’ve started selling?
Technically, yes, but it’s not recommended. Changing currency after you have orders can cause confusion with financial records and reporting. It’s best to decide on your primary currency before launching.
What’s the difference between “Selling Location” and “Shipping Location”?
Your Selling Location determines who can place an order (their billing address). Your Shipping Location determines where you are physically willing to send the package. They can be the same, or you can have a more flexible shipping policy.
Should I enable geolocation for my customer’s default location?
It’s a great user experience feature and is generally recommended for stores with an international audience. However, if you are only selling to one specific country, setting the “Default Customer Location” to your “Shop Base Address” is simpler and just as effective.