Have you ever wanted to sell a t-shirt that comes in different sizes and colors on your WooCommerce store? If you’ve mastered creating a single product, the next step is learning how to create a single product page that offers multiple options. This is where the power of WooCommerce Product Variations comes in.
It might sound complex, but it’s a straightforward process that transforms your store from basic to professional. In this guide, we will walk you through creating a variable product with multiple attributes, like size and color, step-by-step. By the end, you’ll be able to create a product page where customers can seamlessly select their preferred combinations.
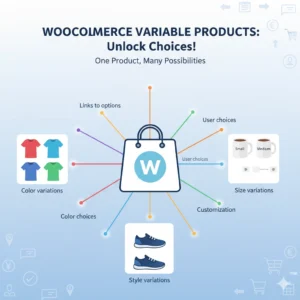
What Are WooCommerce Product Variations?
Think of a product like a basic t-shirt. The product itself is the t-shirt. Now, the attributes are its characteristics, like “Size” and “Color.” Finally, the variations are the specific, unique combinations of those attributes, like a “Large, Black T-shirt” or a “Small, White T-shirt.”
In short:
- Product: T-Shirt
- Attributes: Size (Small, Medium, Large), Color (Black, Blue, White)
- Variations: The 9 specific combinations (e.g., Small Black, Small Blue, Medium Black, etc.).
WooCommerce variations allow you to manage all these combinations under one product, each with its own potential for unique price, stock, and image.
How to Create Your First Variable Product
Let’s build a t-shirt product with size and color options together.
Step 1: Creating Global Attributes
First, we need to create the attributes that you can use across many products. In your WordPress dashboard, go to Products > Attributes.
- You might already have a “Size” attribute from a previous lesson. Now, let’s add “Color.”
- Enter
Coloras the attribute name. - Enter
coloras the slug (this will auto-generate). - Click Add attribute.
![]
Now, let’s add the specific terms (values) for the Color attribute.
- Click Configure terms for the “Color” attribute.
- In the “Add New Color” section, type
Whiteand click Add New Color. - Repeat this process to add
BlueandBlack. - You will now see White, Blue, and Black listed as your color terms.
Step 2: Assigning Attributes to a Produc
Now, let’s apply these attributes to a specific product. Edit or create a new product and scroll down to the Product Data section.
- In the Product Data meta box, select Variable product from the dropdown.
- Click on the Attributes tab.
- From the dropdown, select your “Color” attribute.
- Click Add.
- A new section will appear. Check the values you want for this product (White, Blue, Black).
- Crucially, check the boxes for Visible on the product page and Used for variations.
- Click Save attributes.
Step 3: Generating Variations Automatically
This is the magic step where WooCommerce does the heavy lifting for you.
- Go to the Variations tab.
- From the “Add variation” dropdown, select Create variations from all attributes.
- A pop-up will appear. Click OK.
WooCommerce will now automatically generate all possible combinations of your sizes and colors. In our case, 3 sizes x 3 colors = 9 variations! You’ll see them all listed in the Variations tab.
Step 4: Setting Prices and Managing Stock
You can set a unique price for each variation, or a global price for all.
- To set a global price: At the top of the Variations tab, use the bulk action dropdown. Select Set regular price, enter the price (e.g., 649), and click OK. This will apply the price to all variations at once.
- To set individual prices: You can expand each variation and set a unique price, SKU, and stock status.
Step 5: Adding Variation-Specific Images
For color variations, it’s essential to show the correct image. When a customer selects “Blue,” the main image should change to the blue t-shirt.
- For each variation, click the small arrow to expand its settings.
- Click on the image icon in the variation box.
- Select or upload the correct image for that specific color (e.g., the blue t-shirt image for the “Blue” variations).
- Repeat this for all color options across the different sizes.
Step 6: Handling Stock and Backorders
What if a specific variation goes out of stock?
- Find the variation (e.g., Large, Black).
- Expand its settings.
- In the “Stock status” dropdown, change it from “In stock” to “Out of stock”.
- Click Save Changes and update the product.
Now, on the front end, if a customer selects “Black,” the “Large” size option will be hidden or disabled. If you select “On backorder,” the option will be visible, and it will inform the customer that they can order it now for a future shipment.
Want to Put This Lesson into Practice?
Reading about a setting is one thing, but the best way to learn WooCommerce is by doing. If you’re nervous about breaking your live store, or don’t have a safe place to experiment, a ‘sandbox’ is the perfect solution.
We offer a WooCommerce Practice Account that gives you a pre-built WooCommerce store to test, tweak, and practice on, completely risk-free.
[Link to your Practice Account Service Page]
Ready to Go from Practice to Pro?
Once you’re comfortable with the basics, you might wonder, “What’s next?” A practice account is great for testing, but a structured course gives you the complete roadmap from beginner to confident store owner.
Our comprehensive course guides you through every aspect of WooCommerce, from setup and product creation to advanced shipping, payments, and marketing, all with expert guidance.
If you’re serious about mastering WooCommerce, check out our WooCommerce 101 – Recorded Video Course.
Conclusion
Congratulations! You’ve just unlocked a core feature of professional e-commerce. You now know how to create WooCommerce product variations, manage multiple attributes like size and color, set prices in bulk, assign stunning variation-specific images, and handle stock like a pro. This skill is fundamental for selling any product that comes in different options.
Keep practicing and experimenting—it’s the best way to build your confidence and expertise.
Common Questions About WooCommerce Variations
Can I have more than two attributes, like Size, Color, AND Material?
Absolutely! You can create as many global attributes as you need. WooCommerce will generate variations for every possible combination. Just remember that a large number of attributes can create a very long list of variations, so it’s best to keep it to what’s necessary.
Do I have to use the same price for all variations?
No, not at all. While the bulk action tool is great for setting a uniform price, you can expand each variation individually to set a unique price, sale price, SKU, weight, and stock quantity.
Why are my variations not showing up on the front end?
The most common reason is forgetting to check the “Used for variations” box when assigning attributes to the product in Step 2. Go back to the Attributes tab in your product data and ensure this box is checked for every attribute you want to use for variations.