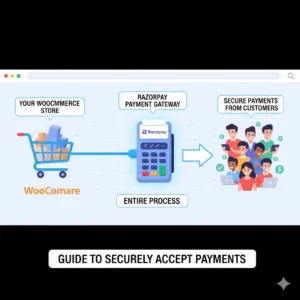
Are you a WooCommerce store owner in India looking to offer your customers the most popular payment method? While cash on delivery and bank transfers work, they aren’t instant. Customers today expect the speed and convenience of UPI payments. But how do you add a UPI QR code to your checkout page?
In this guide, you’ll learn how to seamlessly integrate UPI QR code payments into your WooCommerce store. By the end, you’ll be able to accept instant, direct payments from any UPI app like Google Pay, PhonePe, or BHIM, all without relying on a complex payment gateway.
Understanding UPI QR Code Payments
Before we dive into the setup, let’s clarify what this method entails. When you enable a UPI QR code gateway:
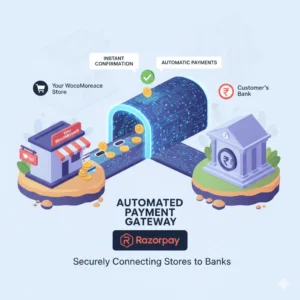
- It’s Direct: Payments go directly from your customer’s bank account to your linked bank account via UPI.
- It’s Manual Verification: This is a crucial point. Unlike automated gateways, this method does not automatically verify if a payment was successful. The store owner (you) must manually check your UPI app to confirm receipt of funds before updating the order status.
- It’s Customer-Friendly: Customers simply scan the QR code with their preferred UPI app and authorize the payment—a familiar and trusted process.
Step 1: Finding and Installing the Right Plugin
WooCommerce doesn’t include a built-in UPI QR payment method. We need to add this functionality with a plugin.
- From your WordPress dashboard, navigate to Plugins > Add New Plugin.
- In the search bar, type “UPI QR code payment gateway for WooCommerce“.
- You will see several options. Look for the plugin named “UPI QR Code Payment Gateway for WooCommerce” by Team NetPay. It typically has a high number of active installations and good ratings.
- Click “Install Now” and then “Activate” the plugin.
[Screenshot of the WordPress plugin search results page showing the recommended UPI plugin]
Step 2: Configuring Your UPI Payment Settings
Once the plugin is activated, it’s time to configure it with your details.
- Go to WooCommerce > Settings > Payments.
- You will see a new payment method called “UPI QR Code.” Click on “Manage” to open its settings.
[Screenshot of the WooCommerce Payments tab showing the new UPI QR Code option]
Now, let’s walk through the key settings you need to configure:
General Settings
- Title: This is the name customers will see at checkout (e.g., “Pay with UPI”).
- Description: Add a short line of text like “Scan and Pay with any UPI App.”
Important Configuration Fields
- Payee UPI Address: This is where you enter your merchant UPI ID (e.g., yourname@oksbi).
- Show Input Field and Handle: This setting controls whether the customer needs to enter their UPI ID during checkout. Leaving it on “Show” is recommended so you know which transaction to verify.
- Payment Status: It is highly advised to set this to “Pending Payment.” This ensures the order stays on hold until you manually verify the payment has landed in your account.
- Merchant UPI/VPA ID: This is the most critical field. Enter your business’s UPI ID here. This is the ID that will be used to generate the QR code, ensuring payments come to you.
Customer Interaction & Verification
- UPI Transaction ID: Set this to “Show and Require Input Field.” This makes it mandatory for the customer to enter their transaction ID (UTR) after making the payment, which helps you track the payment.
- Screenshot Image: Enabling this allows the customer to upload a screenshot of their payment confirmation, giving you another layer of verification.
- Instructions: You can edit the text that guides the customer through the payment process.
After filling in all the necessary details, scroll down and click “Save Changes.”
[Screenshot of the plugin's configuration page with the key fields highlighted]
Step 3: Testing the Checkout Process
Now, let’s see how it works from the customer’s perspective.
- Add a product to your cart and proceed to checkout.
- At the payment step, the customer should see the “Pay with UPI QR Code” option.
- Upon selecting it, they will see a QR code generated using your Merchant UPI ID. They can scan this code with any UPI app to make the payment.
- After payment, they will be prompted to enter the Transaction ID (UTR) and optionally upload a screenshot.
[Screenshot of the WooCommerce checkout page showing the UPI QR code and input field]
Step 4: Managing Orders and Verifying Payments
This is the manual verification part we mentioned.
- Go to WooCommerce > Orders. New orders paid via UPI QR will have a status of “Pending Payment.”
- Open the order. In the order notes, you will see the UPI ID the customer provided and their transaction details.
- Now, open your own UPI app and check your transaction history to confirm you have received the payment for the exact amount.
- Once verified, change the order status from “Pending Payment” to “Processing” or “Completed.” This update will automatically notify the customer that their payment and order have been confirmed.
[Screenshot of the WooCommerce order edit page, highlighting the status change dropdown]
Want to Put This Lesson into Practice?
Reading about a setting is one thing, but the best way to learn WooCommerce is by doing. If you’re nervous about breaking your live store, or don’t have a safe place to experiment, a ‘sandbox’ is the perfect solution.
We offer a WooCommerce Practice Account that gives you a pre-built WooCommerce store to test, tweak, and practice on, completely risk-free.
[Link to your Practice Account Service Page]
Ready to Go from Practice to Pro?
Once you’re comfortable with the basics, you might wonder, “What’s next?” A practice account is great for testing, but a structured course gives you the complete roadmap from beginner to confident store owner.
Our comprehensive course guides you through every aspect of WooCommerce, from setup and product creation to advanced shipping, payments, and marketing, all with expert guidance.
If you’re serious about mastering WooCommerce, check out our WooCommerce 101 – Recorded Video Course.
Conclusion
Congratulations! You’ve successfully learned how to set up and manage UPI QR code payments on your WooCommerce store. This payment method is a game-changer for the Indian market, offering the speed and convenience your customers expect. Remember, the key to success with this method is diligent manual verification of each payment. Keep practicing, and you’ll be processing UPI orders like a pro in no time.
Common Questions About UPI QR Payments
Q: Is the UPI QR payment method secure?
A: Yes, it is very secure. The payment happens directly between the customer’s bank and your bank via the secure UPI infrastructure. The plugin itself does not handle sensitive financial data like card numbers.
Q: Can customers pay with any UPI app?
A: Absolutely. The generated QR code is universal and can be scanned by any UPI-based application, including Google Pay, PhonePe, Paytm, BHIM, and many others.
Q: Why is manual verification necessary?
A. The standard UPI QR plugin operates “off-site,” meaning WooCommerce has no automated way to ping the banking system and confirm a payment was received. Manual verification by checking your bank account is the safe and reliable method to prevent fraud and ensure you only fulfill paid orders.