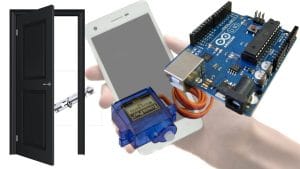
About this Home Security Arduino Project
This home security Arduino project open and close door load via SMS and RFID. This guide will help you to make this project yourself.
What do you need? Hardware
1. Arduino (Any model)
Obviously, we need an Arduino to connect all hardware and implement our logic. I tried with Arduino uno r3 but you can buy any Arduino model. Although, I don’t guarantee that it will work with other Arduino models.

2. Servo Motor
Second thing you need is a servo motor to open and close the doors. Although, I used servo motor for this project but that was not my first choice. I wanted to use a solenoid lock but I was running a low on budget 🙂
3. RFID Reader
Than you need a RFID reader, RFID card and RFID tag, you will get all these bundled in one package. This RFID reader will help us in reading the RFID tag id and RFID tag code. We can decide to open or not to open the door based on the code received from RFID card or tag.

4. SIM900A GSM module
The last thing we need is a SIM900A GSM module to receive and send SMSs. We will use this module to open and close door by sending an SMS. We will also use this module to send an SMS when door is opened with RFID tag/card.

5. Wires (male to female) (male to male)
No Arduino project can be made without wires and we need those also.
Connections
Connect Servo Motor with Arduino
Servo motor has 3 wires: Red, Brown and Orange. Connect Red wire to 5V Arduino pin, Brown wire to ground (GND) pin of Arduino, and Orange wire to digital 8 pin of Arduino.
Connect RFID with Arduino
RFID is the most difficult to connect with Arduino. So, we careful. PIN in RFID card are marked as ‘3.3v’, ‘RST’, ‘GND’, ‘RQ’, ‘MOSISI’, ‘SCK’, ‘SDA’. Connect like this:
RFID -> Arduino

3.3v -> 3.3v

RST -> 9

GND -> GND

RQ -> 12

MOSISI -> 11

SCK -> 13

SDA -> 10
Connect SIM900A GSM module with Arduino
GSM900A is very easy to connect with Arduino. It has many pins but we will use only three pins RX, TX and GND. Connect GND to GND, RX to 3 digital pin of Arduino and TX to 2 digital pin of Arduino.
Power GSM900A
Power GSM900A with 12v 2 amp power adaptor. Note: 12V 1amp power adaptor will not provide proper power to GSM900A module, so don’t buy that.
Put SIM in GSM900A slot
Now its time to put a SIM in GSM900A module. Note: 4G SIM does not work in GSM900A module, make sure to put only a sim which is not 4G, for me JIO doesn’t work in GSM900A but an old Airtel sim worked, which was not 4G SIM.
Program Arduino
Now its time to program arduino, If your connections are same as mentioned in this post than this code should work properly. Connect Arduino to Computer to program it. Copy-paste this code in a new Arduino file, replace +91XXXXXXXXXX with your mobile number and save it with any name.
#include <SPI.h>
#include <MFRC522.h>
#include <Servo.h>
#include "timer.h"
#include <SoftwareSerial.h>

SoftwareSerial mySerial(2,3);
String msg;
String num;
String sms;
String textMessage;

#define SS_PIN 10
#define RST_PIN 9

Servo myservo;

auto timer = timer_create_default();

MFRC522 mfrc522(SS_PIN, RST_PIN);

void setup() {
  mySerial.begin(9600);   // Setting the baud rate of GSM Module
  Serial.println("GSM SIM900A BEGIN");

  Serial.begin(9600);
  SPI.begin();

  mfrc522.PCD_Init();

  Serial.println("Put your card to the reader...");
  Serial.println();

  myservo.attach(8);
  myservo.write(0);

  timer.every(60000, close_door); //EVERY 60 SECOND CLOSE THE DOOR
  delay(100);
}

void close_door()
{
  Serial.println(myservo.read());
  if(myservo.read() > 0){
    delay(500);
    myservo.write(0);
  }
  Serial.println(myservo.read());
}

void loop() {
  timer.tick();

 if (mySerial.available()>0)
 {
  delay(1000);
   Serial.write(mySerial.read());
   msg = mySerial.readString();
   num = msg.substring(8,21);
   sms = msg.substring(50,53);
   Serial.println("Custom message");
   Serial.println(msg);
   Serial.println(num);
   Serial.println("1"+sms+"1");
   delay(500);
   if(num=="+91XXXXXXXXXX") //REGISTERED MOBILE NUMBER
   {
    if(sms=="#on") myservo.write(180);
    if(sms=="#of") myservo.write(0);
   }
 }
  if(!mfrc522.PICC_IsNewCardPresent())
  {
    return;
  }

  if(!mfrc522.PICC_ReadCardSerial())
  {
    return;
  }

mySerial.println("AT+CNMI=2,2,0,0,0"); // AT Command to receive a live SMS
  delay(1000);
  Serial.print("UID tag: ");
  String content="";
  byte letter;

  for(byte i=0; i< mfrc522.uid.size; i++)
  {
    Serial.print(mfrc522.uid.uidByte[i] < 0x10 ? " 0" : " ");
    Serial.print(mfrc522.uid.uidByte[i], HEX);
    content.concat(String(mfrc522.uid.uidByte[i] < 0x10 ? " 0" : " "));
    content.concat(String(mfrc522.uid.uidByte[i], HEX));
  }

  Serial.println();
  Serial.print("Message : ");
  content.toUpperCase();
  if (content.substring(1) == "76 EA E4 1F")
  {
    Serial.println("Authorized access");
    myservo.write(180); //Unlock the door
    textMessage = "door open from an authorized card";
    mySerial.println("AT+CMGF=1");    //Sets the GSM Module in Text Mode
  delay(1000);  // Delay of 1000 milli seconds or 1 second
  mySerial.println("AT+CMGS=\"+91XXXXXXXXXX\"\r"); // Replace x with mobile number
  delay(1000);
  mySerial.println(textMessage);// The SMS text you want to send
  delay(100);
  mySerial.println((char)26);// ASCII code of CTRL+Z
  delay(1000);
  }
  else{
  Serial.println("Unauthorized access");
  textMessage= "Wrong Card presented at your door";
  mySerial.println("AT+CMGF=1");    //Sets the GSM Module in Text Mode
  delay(1000);  // Delay of 1000 milli seconds or 1 second
  mySerial.println("AT+CMGS=\"+91XXXXXXXXXX\"\r"); // Replace x with mobile number
  delay(1000);
  mySerial.println(textMessage);// The SMS text you want to send
  delay(100);
  mySerial.println((char)26);// ASCII code of CTRL+Z
  delay(1000);
  }
}
You need to add some libraries to arduino IDE before compiling this code. Go to Tools -> Manage Libraries. Wait sometime while it download libraries index.
Search for “MFRC522” and install this one

Search for “timer” and install this library

Once these libraries are installed you can now compile and upload the program to Arduino. If program is installed without any problem than you are ready to test your circuit.
Test everything
Start the serial monitor by clicking the “lens” icon available in Arduino IDE toolbox. Once the serial monitor window is available you will see the text “Put your card to the reader…”. After this text appear on serial monitor. Present the RFID card/tag to RFID reader, you will see a message on serial monitor that will display your RFID card/tag’s number and you will also receive an SMS saying “Wrong Card presented at your door”.
Note that RFID card/tag number and replace 76 EA E4 1F string with the card/tag number you just noted. Save the program and upload to Arduino once again.
Now your card is registered in the program and when you will present it in front of RFID reader, on Serial monitor you will get this message “Authorized access”, the Servo motor will move to 180 degree and you will receive a message “door open from an authorized card”.
Note: The Arduino will keep sending the signal to Servo motor after every 1 minute to move to 0 degree. So, if your servo motor is at 180 degree it will move to 0 degree in less than 1 minute.
Now its time to open door via SMS, from your registered mobile send #on SMS to the SIM available in GSM900A. If everything is fine, you will see message on Serial monitor and Servo monitor will move to 180 degree. Similarly when you will send #of in SMS Servo motor will move to 0 degree.
Fix everything in a house model
Now you have tested everything, lets fix everything in a house model. I fixed everything like this but you can build any other model.


